

Setting Up a Programming Environment in Windows: VSCode & Java
Steven J. Zeil
This document will walk you through setting up a Java programming environment using: * the Eclipse IDE running natively on Windows, and * Java running natively on Windows
1 Installing Java
There are two main Java packages.
-
The Java Runtime Environment (JRE) allows you to run Java programs that someone else has compiled.
-
The Java Development Kit (JDK), also referred to as the Software Development Kit (SDK) includes the JRE plus the Java compiler.
For programming in Java, you will need the JDK. Get it here.
- You will typically have multiple options as to what version of the JDK you want. I recommend that you get one of the “LTS” (Long Term Support) versions, currently 17.x and 21.x, as this is likely to provide the most stability.
Download the installer for your PC’s operating system and run it.
2 Install VSCode
Next up is the VSCode IDE.
-
Get VSCode here and install it on your PC.
-
Run VSCode. In a freshly installed state, it does not know how to work with Java. We’ll fix that limitations by immediately installing some extensions.
Click on the
 button to enter the list of extensions.
 -
Use the text box at the top of the left column to search for “Java”. Locate and install the following extension:
-
Extension Pack for Java
-
-
Exit VSCode.
3 Try it Out
-
Choose a convenient directory where you want to keep a project. Copy the files Pie.java, PieSlicer.java, and PieView.java into that directory.
(Do this outside of VSCode, in whatever manner you find most convenient for creating directories and copying files.)
-
Start VSCode. From the
Filemsnu, select “Open Folder” and navigate to the directory where you stored those Java files.When you open a “folder” in VSCode, you are actually opening a project. Projects can contain all sorts of files and may have other directories/folders inside them.
-
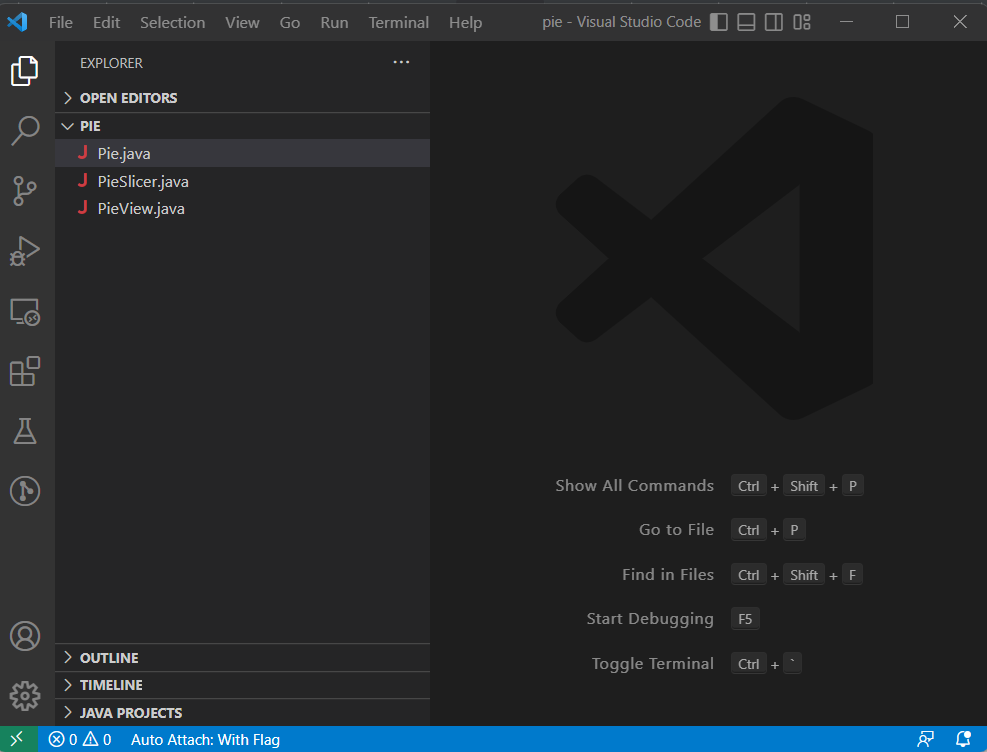
You should be looking at something like the picture shown on the right.
Try clicking on the the various files in the left column to select them and view them in the editor.
-
From the
Viewmenu, select “Problems”. The problems pane should open up, though is should indicate that you have no problems, -
The
mainfunction for this program is in PieSlicer.java. Right-click onPieSlicer.javaand select “Run Java”. You should see the program start running almost instantly.You should see a small window pop up with a circle and a couple of buttons. Move your mouse around inside the circle a bit, and try the buttons. It’s nothing spectacular – just a bit of fluff for us to play with in this exercise. Close the window to kill the program.
-
Click on Pie.java to open it in the editor. Let’s introduce a simple error into the code. Look for a line that mentions
Color.redand change “red” to “maroon”.A small red marker will appear on the right of the window, and “maroon” will be underlined in red, both indicating that an error has been detected.
You should see an error message appear in “Problems” area below the editor. The message indicates that the class
Colordoes not contain a constant named “maroon”. -
Of course, at this stage in your Java programming studies, you might not know what color names are provided by that class. But VSCode can tell you.
Hover your mouse over the error again, and notice the offer of a “quick fix”. Type Ctrl-. and VSCode will offer a list of legal replacements. Select “RED”.
-
Save your changes via the File menu.
-
Exit VSCode. It will save your project information so that, when you return and run open that project folder again, it will remember what files you had open.