

IDEs & Remote Display
Steven Zeil
In this lesson, we will look at Integrated Development Environments (IDEs) that work well when run using X windows to support the remote display style of development.
1 emacs and vim
If we compare the basic function of an IDE to the support available in emacs and vim:
| project setup | editing | building (compiling) | debugging | |
|---|---|---|---|---|
emacs |
(via make) |
yes | M-x compile |
yes |
vim |
(via make) |
yes | :make |
no |
we can see that the combination of emacs and make fulfills all of the basic functions of an IDE. (We’ll look at debugging support in a later lesson.) The combination of vim and make fulfills 75% of the basic functions of an IDE.
emacs and vim may not be the most elegant of IDEs, but they are a solid fall-back for Linux programmers, in part because they work in both text-mode and graphics-mode sessions.
Neither directly supports the notion of a project. Rather, because their default “build” commands are to run make, they assume that you will use a make file as the basis of your project management.
2 Eclipse
2.1 Programming with Eclipse
Eclipse is a multi-platform IDE that is equally at home on both Windows and *nix systems. Eclipse may be the most popular IDE for use with Java programming. It has a flexible plug-in system that allows additions of support for many different programming tools that “real” programmers use “in the field”
If Eclipse is available on a Linux system, it can often be invoked via the command
eclipse &
2.2 Workspaces and Projects
Most IDEs emphasize the idea of a project, a collection of files, directories, and settings that describe what to build and how to build it.
In Eclipse, each project consists of
-
a directory within which all of your source code, test data, and related files reside. These are often divided among several subdirectories.
-
The main directory that holds all of this is called the project root directory.
-
-
In that project root directory, a small collection of settings files that describe the project. For Java projects, these settings files are named
.projectand.classpath. -
Note that because these file names begin with “
.”, the files are hidden from normallscommands. You need to use “ls -a” to see these files.
Eclipse also has an important concept that it calls a workspace. This is a special directory and collection of files that describe which projects you have available.
When you run Eclipse, it first asks what workspace you would like to use. As a student you can probably go a long way using just a single workspace, in which case selecting the default directory that Eclipse suggests for your workspace is probably fine. If you later feel overwhelmed by the number of projects in your workspace but don’t want to remove any of them, you might consider using a different workspace for each course.
Do not use the same directory for your workspace and for the root of a single project.
In fact, I strongly recommend that you do not store your project directories anywhere within your workspace directory, even though Eclipse will offer to do so by default. Doing this can lead to a lot of complications.
Also, Windows users should note:
Do not store your projects on OneDrive. It will cause problems for some build managers.
2.3 Creating Java Projects in Eclipse
Eclipse will allow you to create a new Java project in an empty directory or to create a project in a directory that has already been set up with some code.
I recommend that you set up your project directory first, with at least one .java file in place, before pointing Eclipse at it. If necessary, create an empty foo.java file in the directory where you expect to keep your source code.
The reason for this recommendation is that the first time Eclipse looks at a project directory, it will examine where you have placed your Java source code and set up your project accordingly. If your project’s source directory is the project root, Eclipse will record that info and compile your code accordingly. If your project’s source code is in src/, Eclipse will find it there, and thereafter treat that as your project’s source directory.
To create a new Java project in Eclipse:
- Set up the project directory first. Get your Java files into the place where you want them.
- Run Eclipse. Eclipse will ask what workspace you would like to use. Unless you have good reason to do otherwise, just select the suggested default from Eclipse.
- Now look carefully at the files in your project root directory.
- If you see a file named
pom.xmlin there, this project is set up to use Maven. In Eclipse, go to theFilemenu and selectImport...,Maven, thenExisting Maven Projects.- When the “Maven Project” box comes up, use the
Browsebutton to select your project directory. - Click
Nextuntil you canFinish.
- When the “Maven Project” box comes up, use the
- If you see a file named
build.gradlein there, this project is set up to use Gradle. In Eclipse, go to theFilemenu and selectImport...,Gradle, thenExisting Gradle Project.- When the “Import Gradle Project” box comes up, use the
Browsebutton to select your project directory. - Click
Nextuntil you canFinish.
- When the “Import Gradle Project” box comes up, use the
- If you don’t see evidence of Maven or Grade, go to the
Filemenu and selectNew, thenProject..., thenJavaandJava Project’.- When the “Create a Java Project” box comes up, clear the checkboxes labeled
Use default locationandCreate module-info.java, then use theBrowsebutton to select your project directory. - Click
Nextuntil you canFinish.
- When the “Create a Java Project” box comes up, clear the checkboxes labeled
- If you see a file named
2.4 Working on Your Project
You can then edit existing files or create new ones. Eclipse can complete partially-typed names and offer suggestions as to what may legally be placed at the cursor position. Type Ctrl-space to see this help. It also may offer such help if you simply pause for a moment at a suggestive spot (e.g., immediately after a ‘.’).
While you are typing your code, Eclipse is checking continuously for errors. Almost all Java compilation errors and many C++ errors will actually be flagged for you as you commit them, instead of waiting until you explicitly request a compilation/build of your project.
When you are ready, you can attempt a project build, via the menus or the toolbar buttons (hover your mouse over each button to discover what it does. If you have error messages, selecting one will take you to the relevant code location.
Once your errors have been dealt with, you can run the project or launch the debugger. You can do this via the menus, the toolbar buttons, or by right-clicking on the executable file in the Project Explorer and selecting the relevant action.
Eclipse has some truly interesting features, especially for Java. For example, it “knows” about many of the common transformations that programmers make to their code and can apply them in one step. These are called refactorings. A basic example of refactoring is renaming a variable or function - Eclipse not only changes the name where the variable/function is declared, but also all the places where it is used, and it is smart enough to distinguish between uses of different functions or variables that happen to have the same name. Another refactoring is to “encapsulate” a data member, making the data member private and creating get/set functions for public access to it, all in one step.
Eclipse also understands the basic structure of the language. If you select a variable or function name with the mouse, you can ask Eclipse to take you to the line of code where that name is declared. Or you can select a declaration and ask Eclipse to list all the places in your code where that name is used.
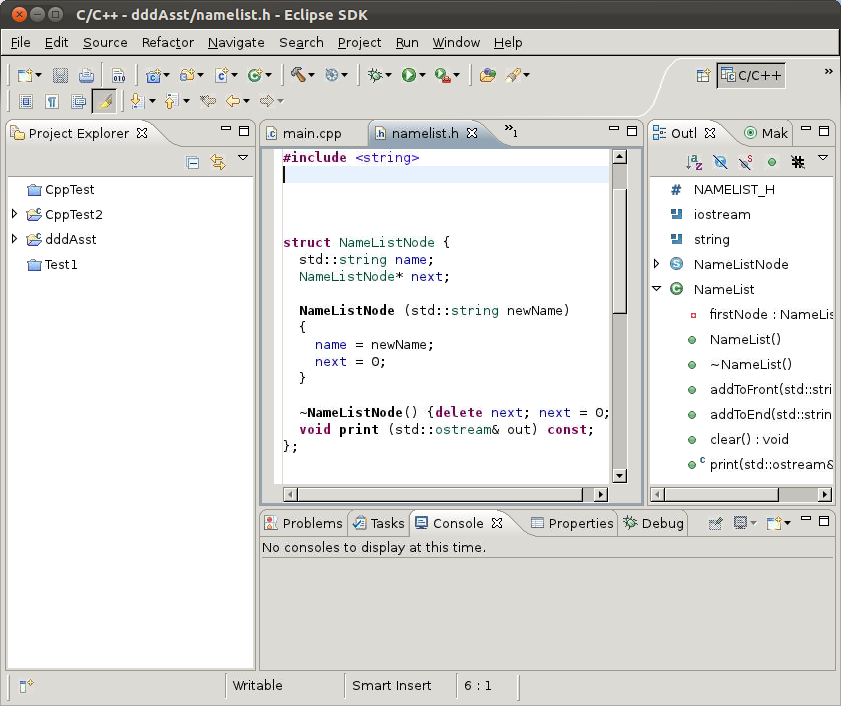
Example 1: Try This: Eclipse in Linux
Start an
xtermon one of the Dept Linux servers.Get a copy of a program for us to play with:
mkdir ~/playing/eclipse
mkdir ~/playing/eclipse/primes
cd ~/playing/eclipse/primes
cp -r ~cs252/Assignments/primes/* .
ls -R
Now, run Eclipse:
eclipse &You will be asked where you want to keep your workspace (the default area for all of your project settings). Accept the suggestion or browse to a more convenient directory.
If you get an error saying that your workspace is “currently in use”, you have probably left an eclipse session running on a different server. See here
If this is your first time running Eclipse, you will be taken to a Welcome page. Close that or click on the curved arrow on the right to enter your workbench.
Select “New”, then “Project…” from the File menu or by right-clicking in the Package explorer pane on the left. Select “Java”, then “Existing Java Project”.
- Clear the “use default location” and “create module-info.java” boxes.
- For “Existing Code Location”, browse to your ~/playing/eclipse/primes directory.
- Accept the rest of the defaults, clicking Next until you come to Finish, then click that.
A box may come up asking if you want to open the Java perspective. Click in the “Remember my decision box” and then click “Yes”. (You probably want to do this whenever you are asked about opening a new perspective).
If you expand the listing in your Project Explorer pane, you will see all of the files and directories in your
primesdirectory.Eclipse will have already partially compiled your code. You will receive some error messages.
Expand the Errors item in the Problems pane to see the error messages.
Double-click on any message and the editor will show you the relevant code location.
Double-click on Primes.java to open it in the editor (if it’s not already open). Click on the first of the two red rectangles on the right of the listing. This should bring you near to to a line to a function named “find”.
Hover your mouse pointer over the phrase underlined in red, and the text of the error message will pop up.
Position your cursor just after the “d” in “find”. Now pretend that you had just been typing “find”, then realized that you weren’t sure what the actual name of the function was that you wanted. Type Ctrl-space and a suggestion box will pop up. It should suggest the functions
findNthPrimeandfindSomething, both of which are functions in this program. Double-click onfindNthPrimeto select it. Eclipse inserts the rest of the function name.Now move down to the next line and delete the semicolon. Notice that an error marker pops up almost immediately on the left. Eclipse will actually find many Java mistakes as you type them, before you actually run the compiler. Restore the semicolon and save the file.
After you save the file, the list of errors in the Problems area will shorten. Use the Problem listing to locate the remaining syntax error, the use of “False” instead of “false”. Correct this and save your changes.
Run the program. Right-click on Primes.java in the “package Explorer” column and select “
Run as...” and then “Java Application”.In the Console area, you will see a message “You must supply…”.
Now look at the code in the function
main. You can see that this message gets printed when the arrayargshas length 0. That array contains the command line parameters supplied to the program. In this step, we did not supply any, so the program informs us that we need to supply an integer.Right-click on Primes.java in the “package Explorer” column and select “
Run as...” and then “Run Configurations”.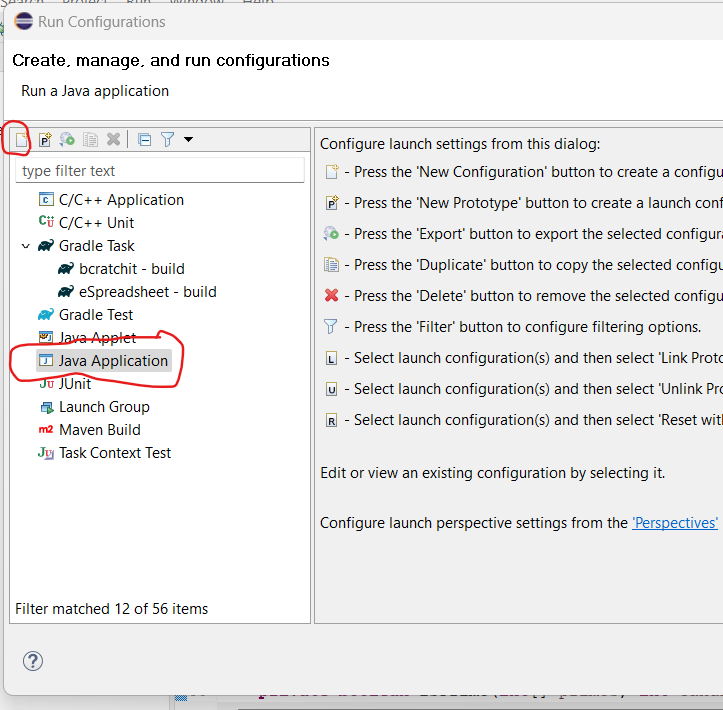
You should see something like this.
Select Java Applications, then click the
New Configurationbutton. This will create a configuration to runcs252.Primes.Go to the
Argumentstab and, in theProgram arguments:box, type3.Click
Runto run the program.You should see, in the Console area, that the program correctly reports that the third prime number is $5$.
Right-click on Primes.java in the “package Explorer” column and again select “
Run as...” and then “Run Configurations”.Select the
Primesconfiguration that you previously created, go to theArgumentstab, and change the3to a5.Click
Run.This time the program incorrectly claims that $9$ is the $5^\mbox{th}$ prime number.
Clearly there is a logic bug somewhere in this code. We’ll track that down in the later lesson on Debugging.
You can now exit from Eclipse.
3 Eclipse and git
3.1 SSH Key Agent Transfer
If you open a project in Eclipse that resides in a directory that is part of a local git repository, Eclipse will take note and will start watching your changes. Eclipse also allows you to run a number of git commands from within Eclipse.
The interaction among Eclipse, git, and the SSH keys required to communicate with GitHub is a bit of a problem. Earlier versions of Eclipse would act as their own SSH key agent, managing a copy of the private key and handling the authentication with GitHub. More recent versions added an “option” to use an already running SSH key agent instead. I put “option” in quotes because, it appears to me as if Eclipse in Linux now insists upon your having an SSH key agent running and will no longer fall back to its old approach. Unfortunately, X2Go does not support the transfer of SSH key agents from your local PC (the “-A” option that we used with ssh commands).
That leaves us with two choices:
-
We can put a copy of our private key on the remote Linux machine, run an SSH agent there, and then launch Eclipse on that machine. This works, but I don’t recommend it.
- Putting your private key on a machine that you share with other people is a security flaw – not a terrible one, because you can use Linux file permissions to make it readable only by yourself, but it’s not a flaw to be taken lightly either.
- SSH agents being run on a remote Linux machine will tend to hang around for along time, unless you are conscientious about killing them when you are ready to log out. Again, this is a security flaw, and a potentially nasty one at that, because someone could connect to your agent after you have logged out and impersonate you, using the keys you have added to the agent.
-
We can launch Eclipse from X2Go, but open a second window with an ordinary (non-X2Go) SSH session to issue the git commands that need SSH communication with GitHub.
There are three git commands that you will not be able to do from inside Eclipse:
git clonegit pushgit pull
These are the three commands that communicate directly with GitHub (or wherever your origin repository is located). You cna still
commitin Eclipse. You can still move forward & backward in time by checking out older versions.
This second option is what I recommend. It retains the security that we expect of an SSH key-based communication.
You cannot
push,pull, orclonewithin X2Go. Therefore you cannot push, pull, or clone from inside Eclipse running in X2Go.Open an ordinary SSH window (with
ssh -A…) to issue those three git commands.
3.2 Eclipse git Features
Despite the unavailability of the three git commands that communicate with the remote origin repository, Eclipse still has a number of useful git-aware features.
-
In the Project Explorer column on the left, you will see, next to the project name, the name of the project repository and an indicator looking something like this:
 .
.- The number after the up-arrow indicates how many commits you have in your local repository that have not been pushed to the origin.
- The number after the down-arrow indicates how many commits fetched from the origin have not been merged into your working directory. Until you start working with git branches, this should be zero.
- If neither error is present, it means that your local repository is up-to-date with respect the the origin as of the last time you pushed/pulled to it.

-
A view is available to help you keep track of what changes you have made since your last commit.
- You may see this already in your center lower panel as a tab called “Git Staging”.
- If not, you can add it by going to the menu
Window -> Show View -> Other..., open theGitfolder, and selectGit staging.
In this panel, you can see a list of Unstaged Changes and Staged Changes, and can move changed files back and forth between the two lists.
-
In the same panel, you have an “Commit Message” are in which you can enter a commit description, and buttons to “Commit” or “Commit and Push” your staged changes.
Because Eclipse will not be able to communicate directly with the origin repository, you cannot use the “and Push” button.
-
You also have a number of options available by right-clicking on the project name in the project Explorer column and going to the
Teammenu. The most significant of these areShow in History, which allows you to view the list of commits and to see which files were changed in each of those commits.
Example 2: Try This: git and Eclipse
Again, make sure that you have registered an SSH key with GitHub and have added that key to an SSH key agent.
If you aren’t sure, run the
ssh-add -lcommand on your local PC to see if it lists your key.Open an SSH session on one of the CS Linux servers:
ssh -A yourLoginName@linux.cs.odu.eduand
cdto~/playing/CS252-project1.From an X2Go
xtermsession, run Eclipse.Next, we are going to point Eclipse at the Java project you created for the earlier
gitTry This exercises.
- From the
Filemenu, create a new Java project.- Use the “Browse Button” to select your
~/playing/CS252-project1directory.- Click
Finish.Within a few seconds, you should see your new Eclipse project in the left column. Notice that the name of the repository (and the branch name, “main”), appear alongside the project name, in [ ].
Look at the bottom panel in the center. If you do not see tab named “Git Staging”, go to the menu
Window -> Show View -> Other..., open theGitfolder, and selectGit staging.You should now see the Git Staging view. Under Unstaged Changes, you see some two or three settings files that Eclipse has added to your project.
If this panel is too small (vertically) to see anything clearly, drag the dividing line between it and the panel above up a bit.
I don’t recommend saving these settings files in your origin repository – the info they contain is very machine-specific. Right click on each of them in turn and select “Ignore”.
- As you do so, you will notice that one or two
.gitignorefiles appear in your list of changed files. These are worth keeping.Do not ignore these.
Open
Pie.javain the Eclipse editor. Add a Java comment and save.You should see
Pie.javaappear in the Unstaged Changes list.Double click on each of the files in the Unstaged Changes area.
Eclipse brings up a “comparison” editor that highlights what changes have been in each one.
Drag the
Pie.javaand the.gitignorefiles to the Staged area.Type a descriptive message into the “Commit Message” box and click the “Commit” button.
You should see the files disappear from the Staged list. You should also see ↑1 appear in the project header in the left column, indicating that you have a commit ready to be pushed.
In your regular SSH, window, give the command
git pushYou should receive confirmation of a successful push.
Visit your project on GitHub and verify that the changes have been sent up to the origin repository.