
HowTo: Get Started Teaching Lectures via Zoom
Steven J. Zeil
1 HowTo: Get Started Teaching Lectures via Zoom
This is a walk-through for a new user of Zoom who wants to deliver a lecture with streaming video, slides, and a simple text-only “whiteboard”.
1.1 1. “Advertise” your Conference
- Browse to https://odu.zoom.us/ .
- Click the
Sign Inbutton and log in with your ODU MIDAS credentials. - You will probably have landed in your Profile area. If not, click
Profileon the left.You should see something like this.
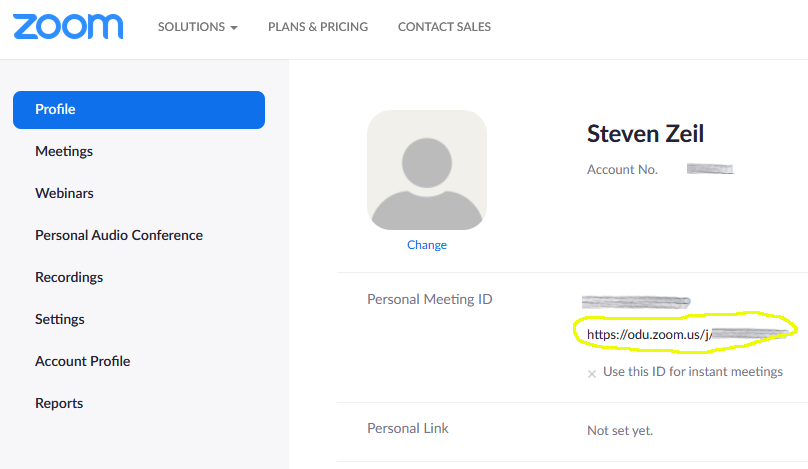
Pay attention to the URL in the “Personal Meeting ID” area. This is your default “room” for conferences. Note 2
-
Post this URL in Blackboard or on your course website or email it to your students to allow them to join your conference.
You might want to include a short list of conference etiquette rules (Note 1) along with the URL.
1.2 2. Prepare for Class
A few minutes before class.
-
Think about what programs you are going to want to use during your lecture. For this walkthrough, I am going to use FireFox to display my slides and a text editor to serve as a cheap whiteboard.
-
Launch those programs, and load in any files, websites, etc., that you want to use.
-
Browse to https://odu.zoom.us/ and sign in again, if necessary.
-
From your profile page, copy your Personal Meeting ID to your clipboard.
-
Click
JOIN A MEETING(near the upper right corner of the web page). You should see something like this: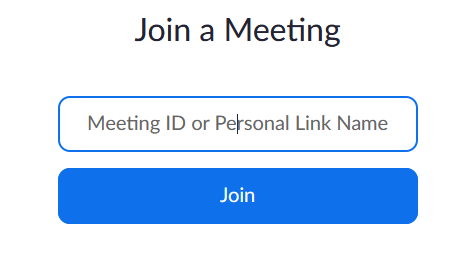
Paste the Meeting ID into the indicated box and click
JOIN. -
If this is your first time running Zoom on this PC, you will be prompted to download and run a Zoom executable.
If you have used Zoom before on this PC, you will be asked to allow the previously downloaded Zoom program to run.
Go ahead and let the Zoom program run.
-
You will be asked if you want to use computer audio.
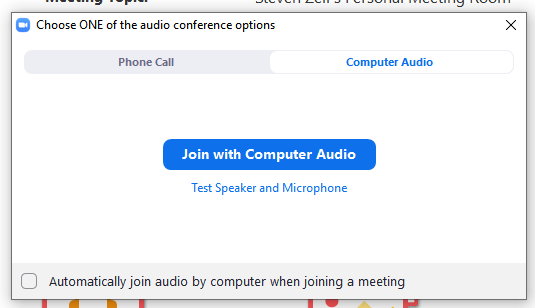
You have the option of testing your speaker and microphone first. That’s not a bad idea your first time using Zoom on any particular PC.
When you are satisfied, click
Join with Computer Audio. -
Your conference is now live! Students may start to join at any moment.
You should be looking at a control window that looks like this:
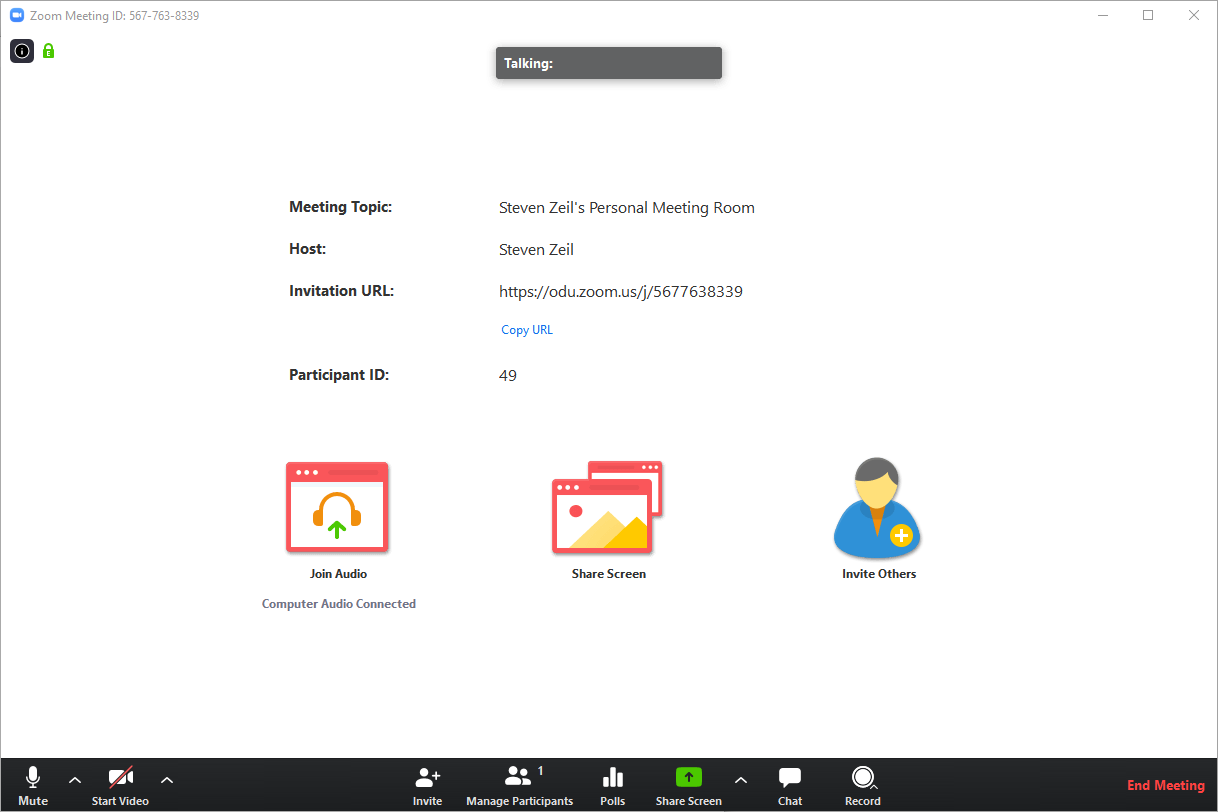
The controls along the bottom will only be visible while your mouse is hovered over the window.
Take a moment to look them over.
-
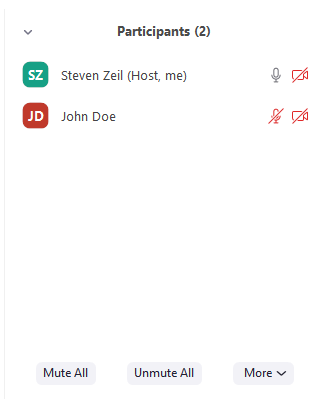
Click the
Manage Participantsbutton.This lets you see who has joined your conference.
-
Click the
Chatbutton.This adds a chat area for any of your students who don’t have a working microphone.
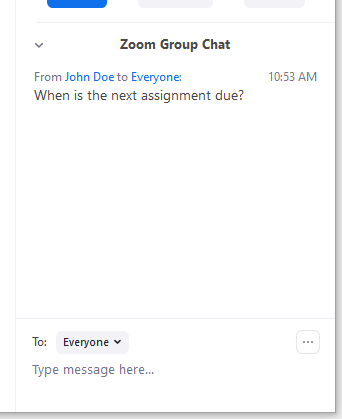
Keep an eye on this as your class progresses. Remember, though, if you have a microphone you can respond verbally to the typed questions.
1.3 3. Start Lecturing
When the scheduled time for your lecture arrives, …
-
Click
Start Videoto activate your camera.Your window will change to show your webcam video (and any students’ videos).
-
Greet your class.
You may want to review the etiquette for on-line meetings at this time. Note 1.
Let students know that Chat is available, but they may need to activate it via the controls at the bottom of their window.
1.3.1 4. Showing Slides and Other Programs
When you get to the point in your lecture where you want to show slides or other screen content…
-
Click the
Share Screenbutton.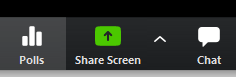
-
You will be presented with a variety of options, e.g.:
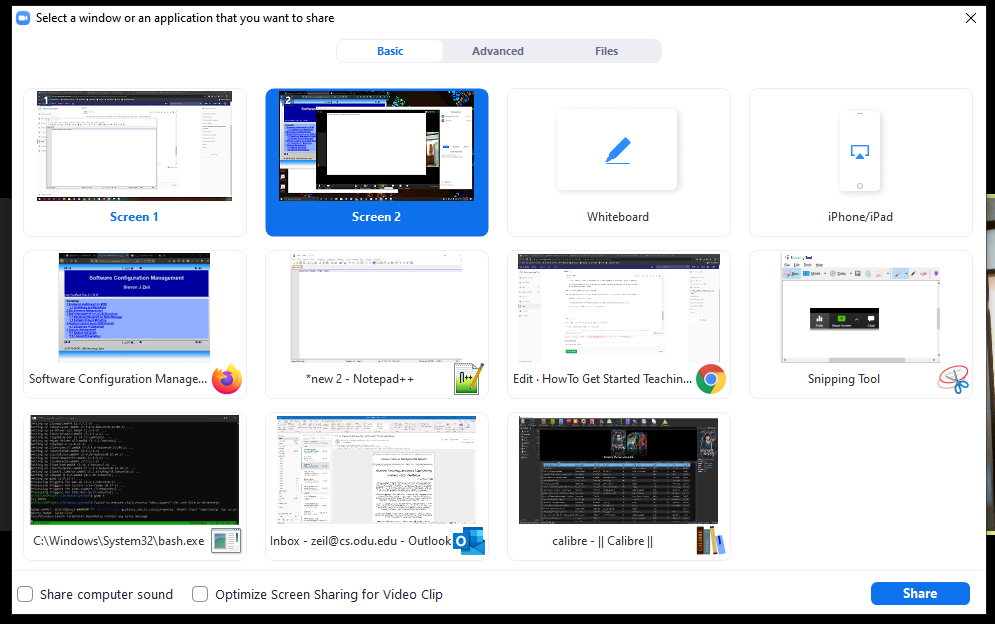
- You can share your entire screen.
- Although easy, this may not be the best choice. If you have a large display and your students are on smaller screens, the view on their end may be fuzzy and hard to read.
- You open a Zoom whiteboard.
- Might be useful, if you are better at freehand drawing than I am.
- You can share one of your open windows.
- Probably the option you should use most often.
- If at all possible, don’t max this window to fill the entire screen. It will look ugly on students’ devices with smaller screens and will get in your way as well.
make your selection and click
Share.For this walk-through, I am going to share a browser window displaying a set of slides.
- You can share your entire screen.
-
While you are sharing, most of the Zoom windows disappear so that they don’t block you from using the window that you are sharing.
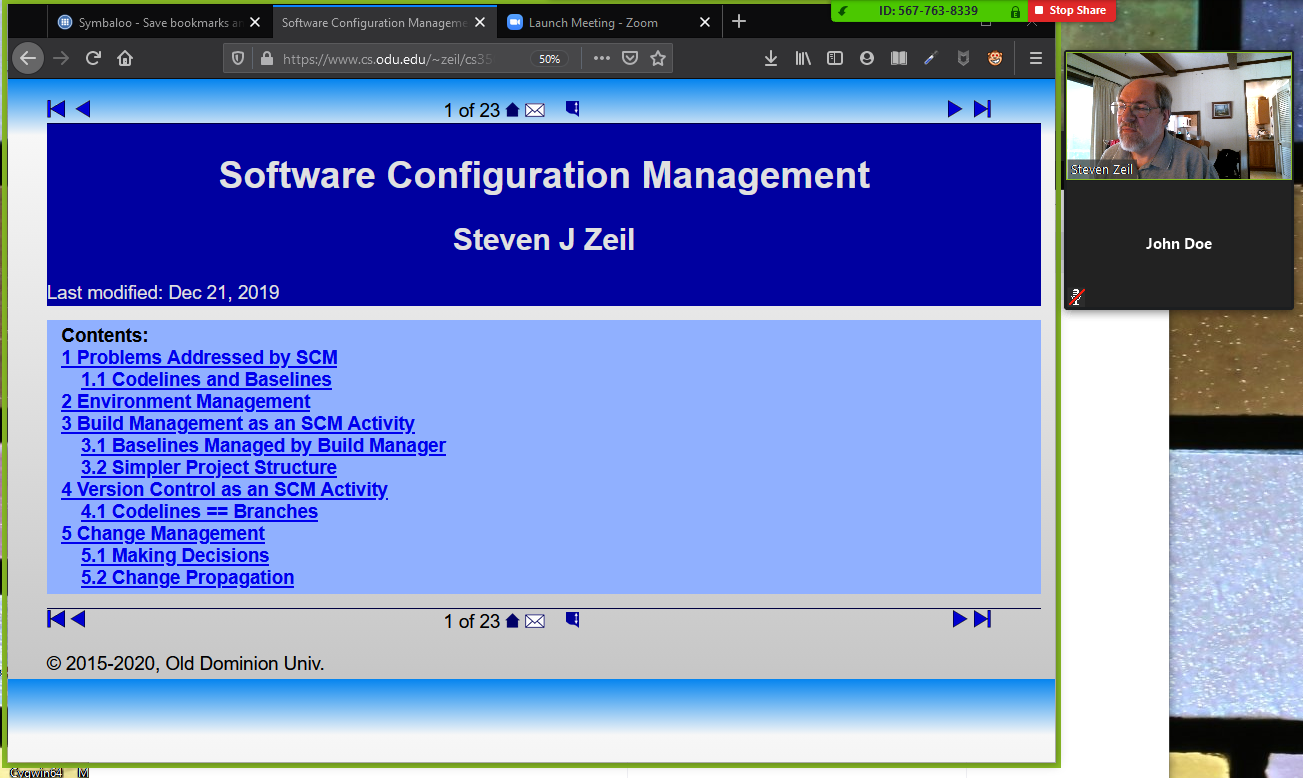
Meanwhile, here is what your students are seeing:
-
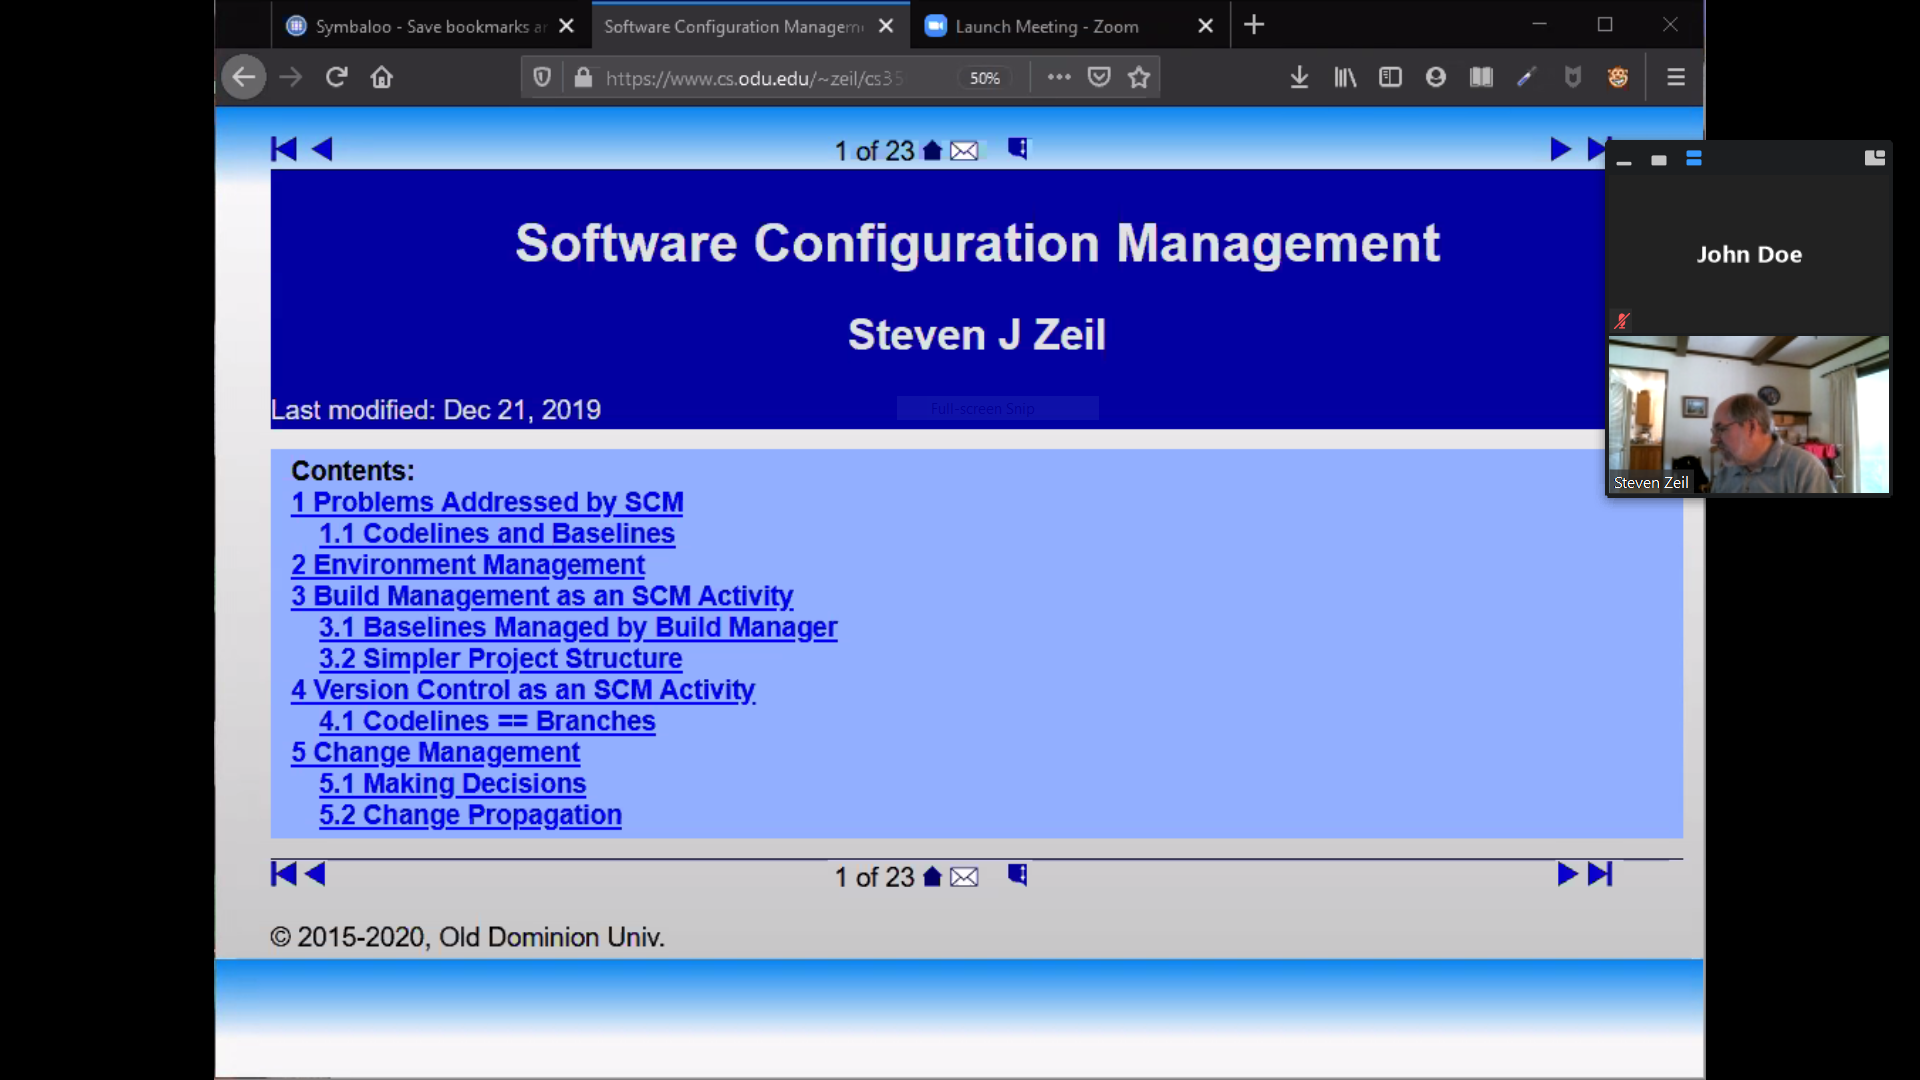
You should see a small Green and Red ID/Stop Share control at the top of your screen.
Move your mouse over that and your full set of Zoom controls will slide down.

-
If your participants list and chat windows closed when you started screen sharing, use the drop-down controls to bring them back. (The Chat button may be hidden in the
More...menu.)If you followed my advice and did not maximize the window that you are sharing, you should have room to move the participants and chat windows out of your way.
You might also want to use the
Stop Videocontrol to turn off your webcam feed while you are in scree sharing mode. -
Proceed with your lecture, manipulating your slides or other shared tool as you normally would. Note 4
-
To share a different window/application, use the drop-down
New Sharecontrol. -
If you are done showing things from your screen, use the
Stop Sharebutton.
1.4 4. End Your Lecture
When it’s time to stop:
- If you are still screen sharing, click
End Meetingin theMore...drop-down menu.If you are no longer screen sharing, you should see
End Meetingin the controls at the bottom of the main Zoom window.
1.4.1 Note 1
Some suggestions for conference etiquette for students:
-
Log in to the session with your real name.
-
Microphones are encouraged. A Chat window will be available for those who do not have a working microphone.
-
When you are not actually speaking, mute your microphone.
- Otherwise the background noise around you can be distracting to students.
- Just because you don’t hear a problem, it doesn’t mean that your open microphone isn’t contributing to a problem for others.
-
WebCams are optional.
- If you seem to be having bandwidth issues, turn your camera off.
1.4.2 Note 2
You can use the “Schedule a Meeting” link on the Zoom website to preschedule conferences in create different “rooms” with different URLs. This allows you to customize some behaviors, such as setting up a waiting room for students who log in early before you are actually ready to start.
If you decide to use your default room for office hours, you might want to schedule your lectures as a different room so that students form other courses don’t come wandering in during the middle of your lecture.
1.4.3 Note 3
The Mute All button is worth pointing out. You should probably advise your students to keep their microphones muted whenever they are not actively trying to speak to you. Otherwise the accumulated background noise can become a problem. But some people may not listen, so: Mute All.
1.4.4 Note 4
One caution: try not to use your mouse to point to things on the screen.
Although the mouse pointer will show up on the students’ view of your shared screen, there’s enough lag time that its motions will appear erratic. Unless you can get into the habit of leaving the mouse in one place for a long time, students might not be able to tell what you were pointing at.
Alternatives:
-
Drag your mouse across text to highlight it. (Doesn’t work in Powerpoint, I know.)
-
One of the Zoom drop-down controls is
Annotate, which let’s you scribble on your screen right on top of your shared content.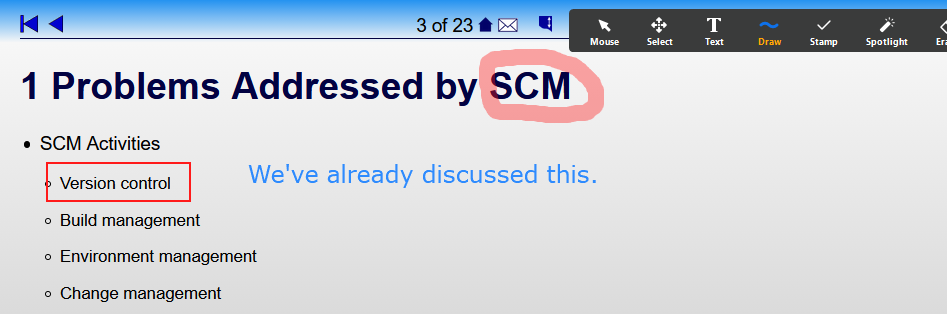
Just remember to clear the annotations before moving on to the next slide, or things will get confusing.