
HowTo: From Blackboard to Zoom and Back Again
Steven J. Zeil
ITS has recently announced a new Faculty Collaboration Portal to ease the process of streaming and recording classes on Zoom.
This is a quick overview of the process of using this portal to
- Schedule your class meetings in Zoom, with the links to the meetings visible to your students in Blackboard.
- Start your Zoom session.
- Publish the recording of your session in Blackboard where your studnets can find them.
1 Before the Semester Starts
Add the two tools: Zoom and Media Gallery to your Blackboard Course.
-
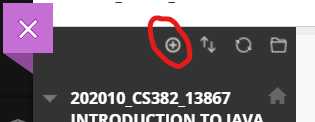
Enter your course area in Blackboard.
-
In the left-hand navigation column, near the top, click “add Menu Item” control.
In the menu that drops down, select “Tool Link”.
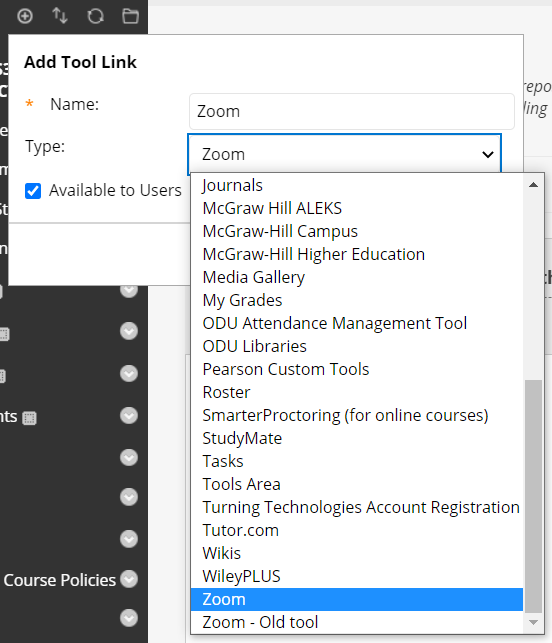
Type in the name (“Zoom”), click the “Available to Users” box, and use the Type: menu to select the Zoom tool.
The Zoom tool will appear in your course navigation area. You can move it up or down as you like.
This is a new tool just released by ITS. If you already had the former Zoom tool in your Blackboard course, you will probably want to remove it.
-
If you do not already have the “Media Gallery” tool (a.k.a. Kaltura) in your course, repeat step 2, this time adding the “Media Gallery” tool.
2 Schedule Your Course Meetings
If you are scheduled to teach in a Zoom-enabled classroom, do not try to schedule your course sections. Don’t do anything!
ITS will schedule your course meetings, probably on the weekend of August 22. They need to handle this in order to associate your meetings with the control boxes installed in the classrooms.
-
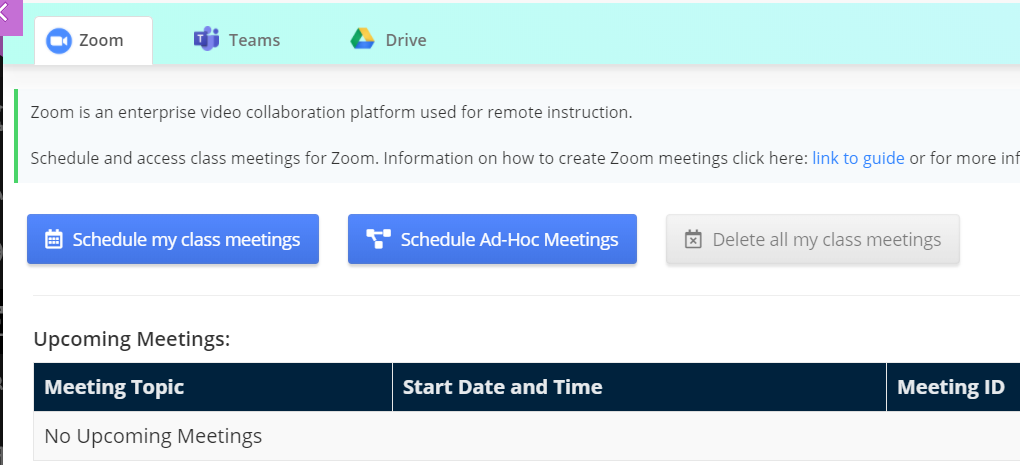
If you are teaching a Zoom-only course and do not have a classroom, go to Blackboard and open the Zoom tool.
-
Click on “Schedule my class meetings” to set up your regular class sessions.
The controls are pretty much self-explanatory. You don’t actually have many options, as the tool understands the starting and ending date of the semester and your course’s scheduled times already.
Your scheduled meetings will show up in both the Zoom tool in Blackboard and in your Zoom account at https://odu.zoom.us. I would not recommend, however, trying to play with the settings from the Zoom website.
3 Conducting Your Class Meetings
-
In the Zoom-enabled classrooms, you should be able to simply press a button on the control box at the teacher’s desk or lectern. That will start the stream running and start recording.
-
For a Zoom-only course,
-
log into Blackboard, enter your course area, and open the Zoom tool.
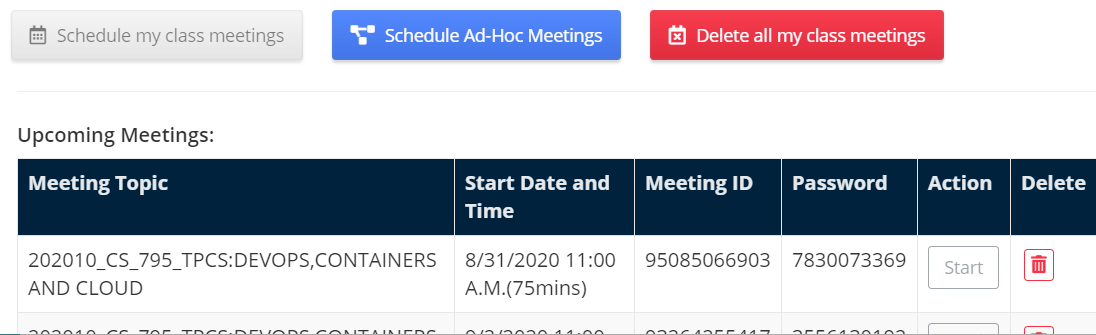
You should see your list of scheduled course sessions. Click “Start” on the appropriate one.
That will start a normal Zoom session, with recording started automatically.
-
Or, log into the MyODU Portal, click on “My Courses”, then select your course, and you should see exactly the same list of upcoming meetings.
Use the Start button to launch your Zoom session, with recording started automatically.
-
4 Publishing the Recordings
It can take a little time after the end of your class session before the recordings are available. Last semester, I found that the waiting times were generally under an hour.
So, after a bit of time has passed,
-
Log into Blackboard, enter your course area, and open the “Media Gallery” tool.
-
Click the “Add Media” button.
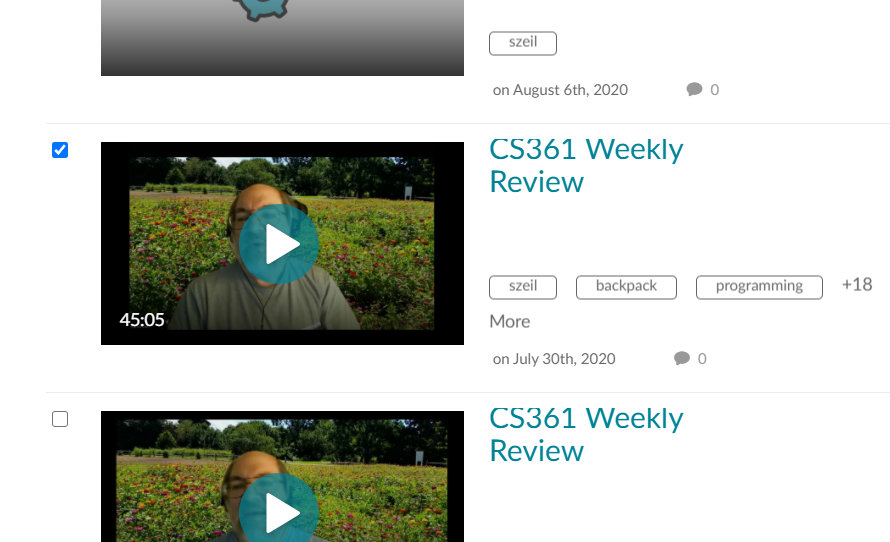
You should see a list of all recordings you have made in Zoom (with, interesting enough, some automatically generated search tags).
Select the video you want, and go back to the top of the page and click “Publish”.
Your selected video will now appear in the Media Gallery tool for both you and your students to see. The videos published via this tool appear to be automatically close-captioned.
4.1 Make Sure it Doesn’t Go Away
By default, Zoom recordings disappear after 30 days.
It’s possible that things posted in the Media Gallery are retained longer – they do appear to be a separate copy of the video. But, it might be a good idea to not take a chance. Your students won’t be happy if all of the recordings are gone when it’s time for them to review for an exam.
-
Log in to Zoom. Click on “Sign In” and go through the usual ODU login procedure.
-
Select “Recordings” from the left column.
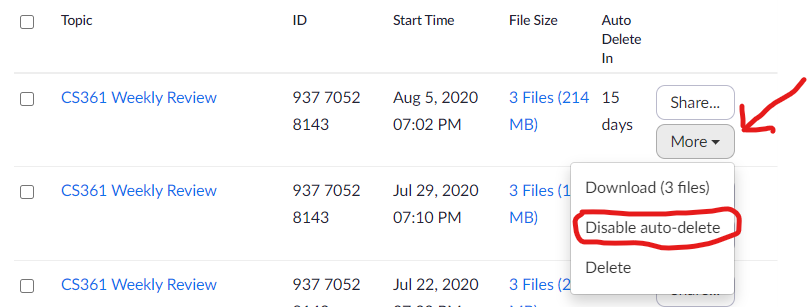
-
Find your recent recording, click the “More” button and disable auto-delete.