
HowTo: Recording Lectures via Zoom
Steven J. Zeil
1 HowTo: Recording Lectures via Zoom
This walk-through covers the basic process of recording a Zoom session and the options available for making that recording available to students.
2 1. Recording
-
When you are ready to start recording, find the
Recordbutton. This will be in the controls at the bottom of the window if you are not screen-sharing, or in the drop-down controls at the top of the screen if you are screen-sharing.
Click the Record button.
-
You’ll be presented with a choice of whether to record to the clout or to store the recording directly on your PC.
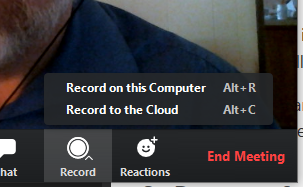
We’re going to go with the “cloud” option, because 1) it easier, 2) it’s less demanding on your PC, and 3) we can always download the recording from the cloud later if we want a copy.
-
Go on with your session.
A tip: the recording will capture the feeds from your and your students’ webcams, and any screen-shared content.
It does not capture the Chat window. So if you have students asking questions via Chat, get in the habit of reading the questions for the sake of the recording: “Ah, I see that John Doe has asked, ‘Will this be on the final exam?’ Yes, in fact I think I will make a special note to add a question on this subject to the final.”
-
When you are finished, click the
Stop Recordingbutton that you will find in the same place where you found theRecordbutton. -
After your session, wait a while. You will eventually receive a notice that your recording has been processed.
This might take a few hours.
3 2. Publishing Your Recorded Video
You’re going to have two basic options about how to make your video available to your students.
- You can leave it in the cloud (i.e., on Zoom’s servers).
- This is easy.
- But Zoom only keeps the video for 30 days.
- You can download the video and publish it elsewhere, e.g., on YouTube.
- This takes more work.
- But you now control the lifetime of the video.
- You also have an opportunity to edit the video, if you wish, before publishing it.
- YouTube videos are automatically close-captioned fr the hearing-impaired.
We’re going to walk through both of these options.
3.1 Leave it in the Cloud
- When your video is ready, you will receive an email notice. That will include a URL from which you can view the video.
You can also check on the status of your video by logging in to odu.zoom.us and clicking on Recordings.

Here you can see that my most recent recording is still processing.
-
When the video is ready, you can click the
Sharebutton alongside it to view the share settings: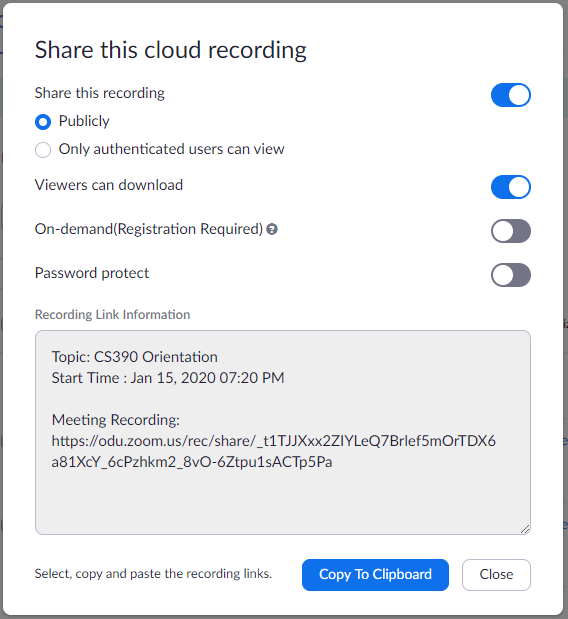
This includes the URL to publish to your students, in case you deleted or did not receive the e-mail.
-
You can paste that URL into your on-line course materials so that students can view your video.
Alternatively…
-
In Blackboard, in any place where you have a
Build Contentmenu, you can selectKaltura embed.
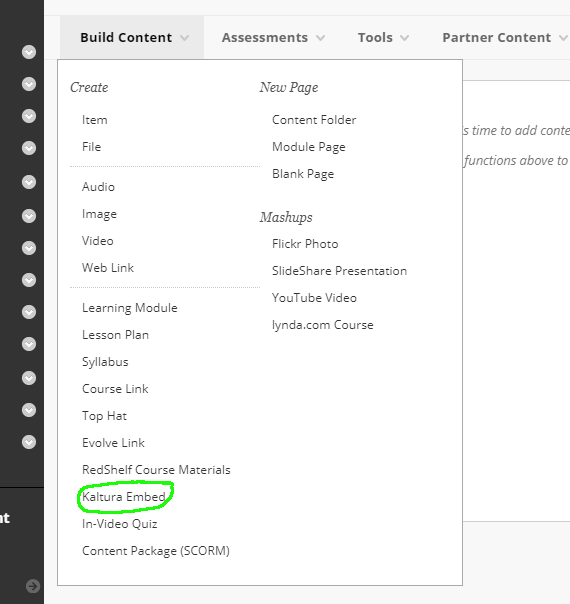
The Kaltura tool appeared to be broken at the time this document was created.
The remainder of this section will be completed when the tool is fixed.
3.2 Download and Publish on YouTube
-
Wait until you video has been processed.
Log in to odu.zoom.us and click on
Recordings.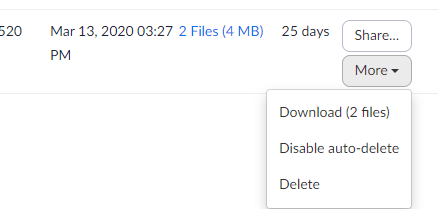
Click the
Morebutton alongside a video that you want to publish.You’ll see the download option. Select that and download to your PC.
You will likely wind up downloading 2 or 3 files: * A
.mp4file containing the audio and video recorded. * A.mp4afile containing the audio only. * If your Chat window was open and active during the recording, a.txtfile containing a transcript of the chat messages.We will concentrate entirely on the
.mp4file. -
If you want to edit your video, now’s the time. We’re going to move directly to publishing it, however.
-
Browse to YouTube
-
You need to be logged in with your ODU MIDAS account.
Click the picture/silhouette in the upper right corner.

If it does not pop up with your
@odu.eduemail address, then sign out and sign back in with your ODU MIDAS credentials. -
Click the small video camera icon to drop down the “Create a video” menu and select
Upload video.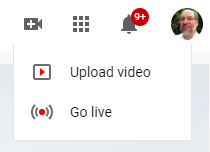
-
You’ll be presented with this area.

Find your
.mp4file and drag it to the center of this box, or click theSELECT FILEbutton to bring up a file navigator. -
The upload will start. While it’s going on, you’ll have an opportunity to title your video, add keywords, etc. Don’t click
NEXTyet.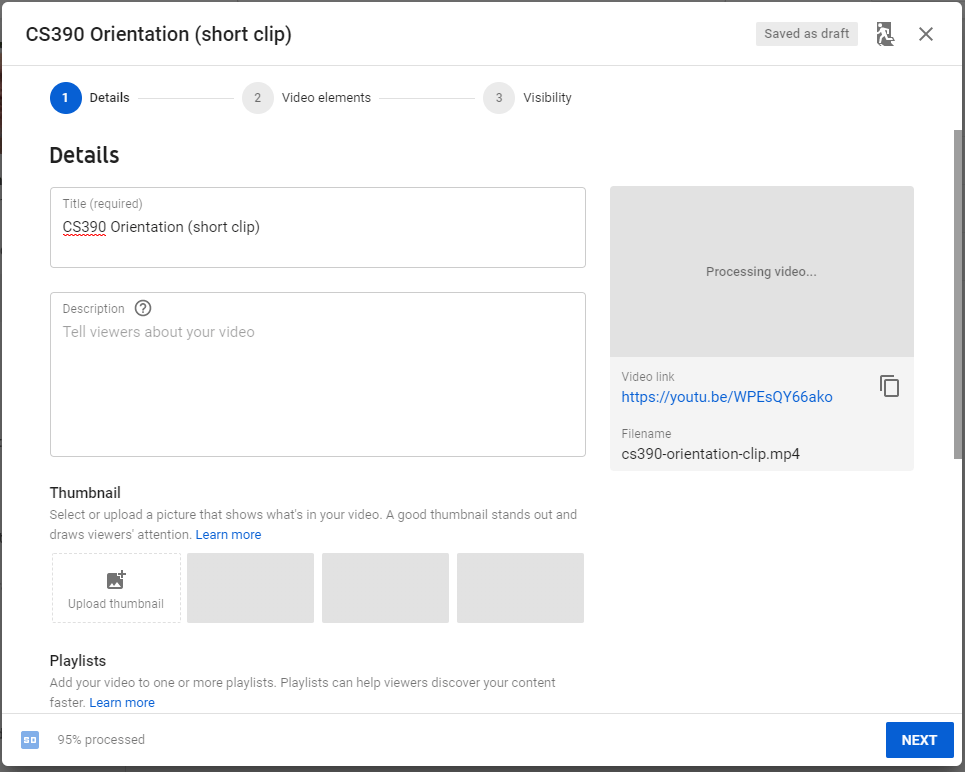
Scroll down and mark that this is not made for kids.
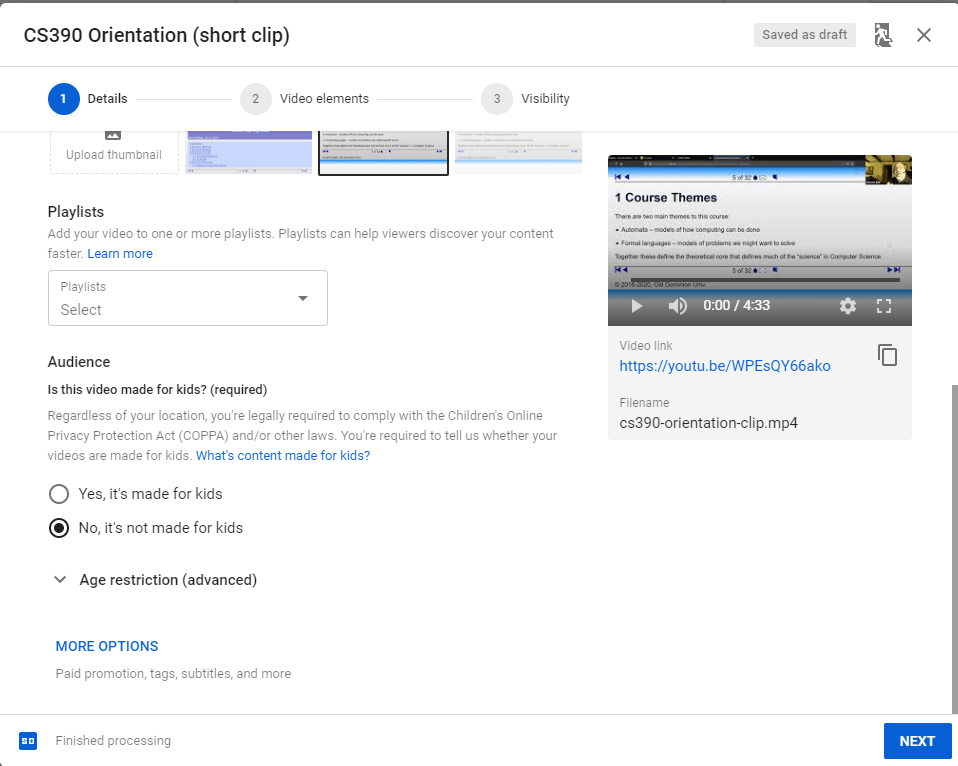
Click
NEXT. -
You can probably skip the Video Elements.
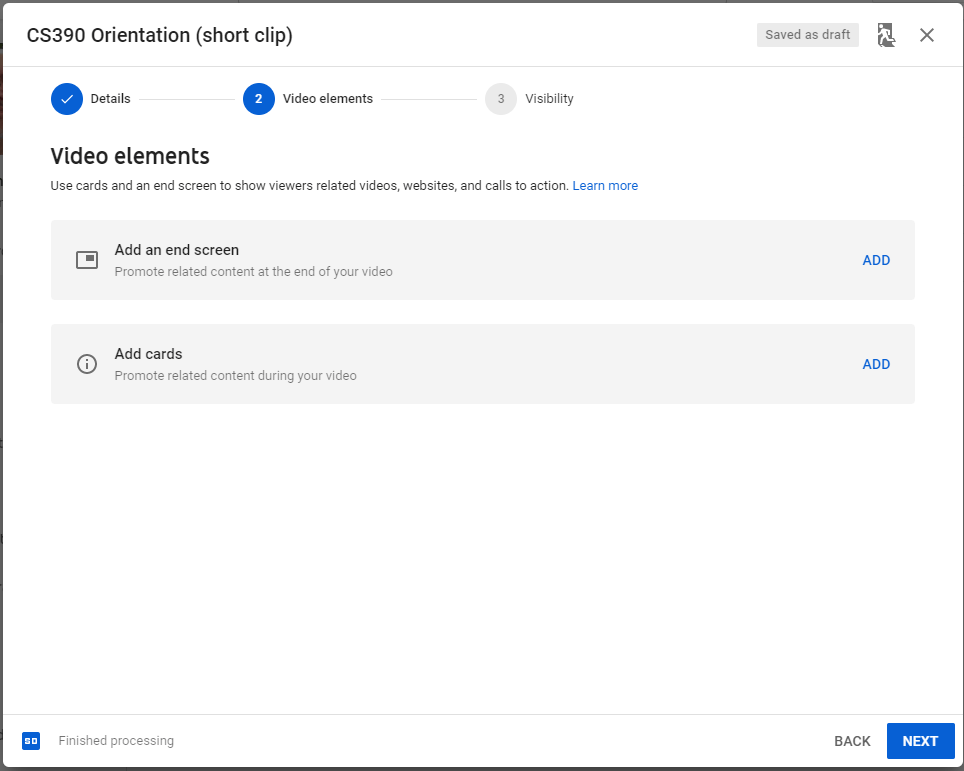
Click
NEXT. -
I generally opt for “Unlisted” visibility. The video will be accessible to anyone with the link.
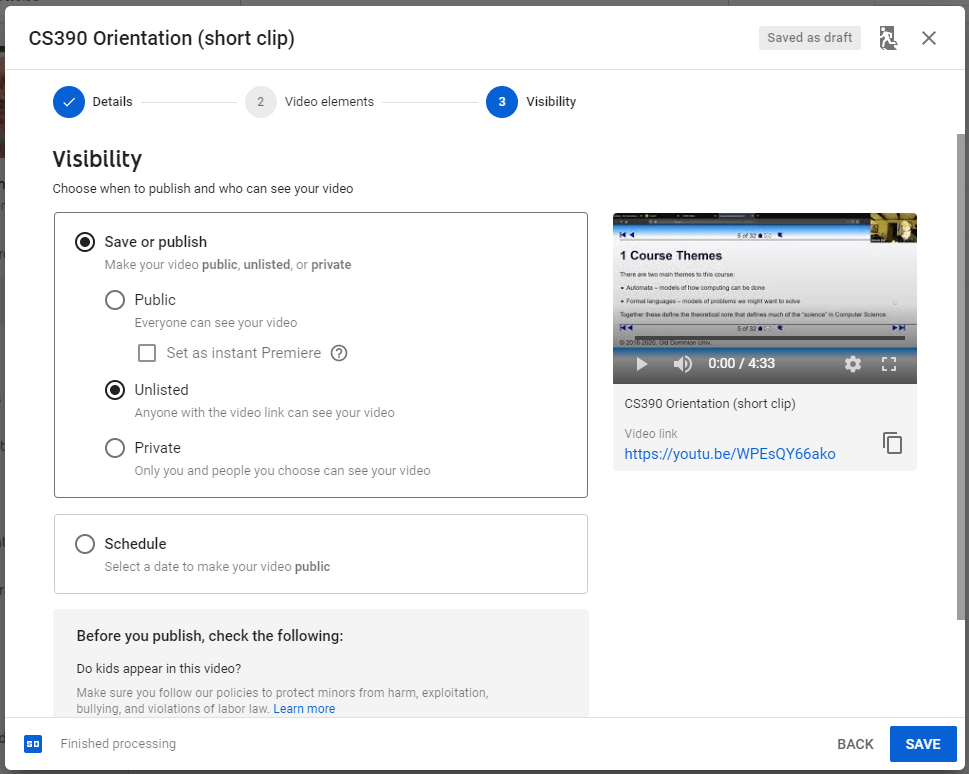
By the time you get this far, your video might or might not be finished uploading and processing.
Take note of the Video link URL - that’s what you will use to publish your video. Copy and paste that link somewhere so that you can insert it into your course.
Click
SAVE. -
Congratulations. You’ve just published a video.
You have another opportunity to save the URL.
Click
CLOSE. -
Now put that URL somewhere in your online course materials where students can use it.
3.3 Managing Your YouTube Videos
Eventually you will want to get back to your list of published videos.
-
Browse to YouTube
-
Click on your picture/silhouette in the upper right corner to drop down a menu.

Select
Youtube Studio. -
Then, on the left, select
Videos
-
You’ll be presented with your list of YouTube videos.
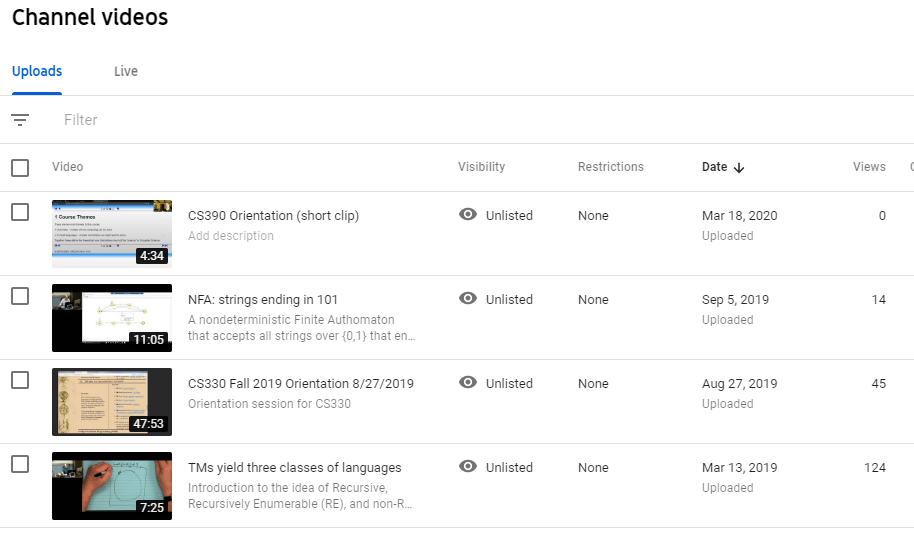
From here you can remove old videos, retitle them or change the other metadata, recover a link URL that you may have lost, etc.