
HowTo: Schedule Distance Office Hours using Microsoft Bookings and Zoom (for ODU faculty)
Steven J. Zeil
Here’s the goal: create a signup sheet that lets you designate your blocks of office hours, from which distance students can request specific time slots.
Here’s an example of what I am talking about. Feel free to try clicking on one of the unused time slots for dates already past to see what happens.
Elsewhere, I have described how to do this with Google Calendar. Here I describe how to use Microsoft Bookings.
There are tradeoffs:
Advantages compared to Google Calendar:
- MS Bookings will integrate with your Outlook Calendar - booked times will appear there as people make appointments.
- You will receive email notices from Bookings when people make appointments.
Disdadvantages compared to Google Calendar:
- One-time changes to your office hours (e.g., you have a dentist appointment and can’t hold your office hours that day or need to push them back an hour) are a pain to handle in Bookings, but trivial in Google Calendar.
1 Prepare Your Web Conference
In Zoom, set up a block of time for office hours.
- Set it up as a recurring meeting, extending far enough into the future to cover the semester.
Don’t worry about matching the exact times of your office hours. You’ll be able to reuse the same meeting URL as long as there’s at least one recurrence left in the future.
-
Activate the waiting room feature so that students can’t wander into your session while you are still talking to a different student.
-
Get the link for students to join the meeting and keep it handy.
2 Connect to Bookings.
-
Log in to Office 365. (Bookings is available online, not as a desktop application.)
-
Click
All Apps. -
Select
Bookings -
You’ll be asked to enter some basic information about the organization you work for.
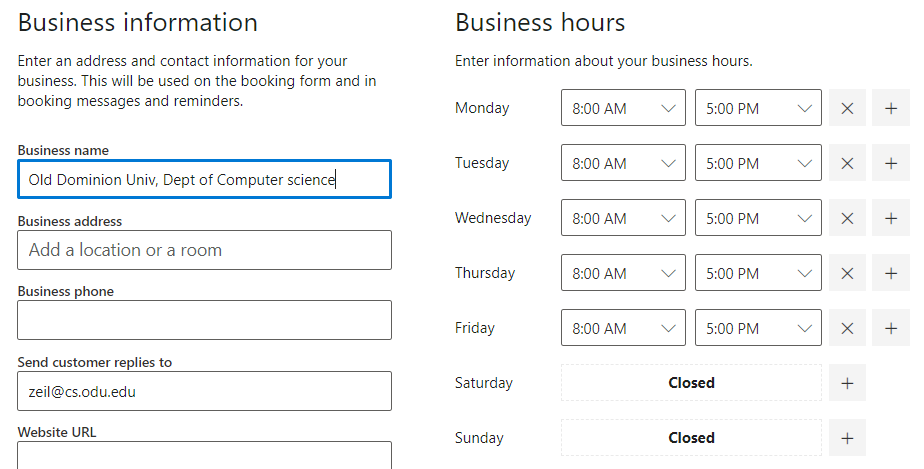
- The Business Hours section can be ignored. We won’t be relying on that.
3 Set Up an Office Hours “Service”
-
Click on
Staff. You should see yourself listed. Click on the Edit “pencil” on the right.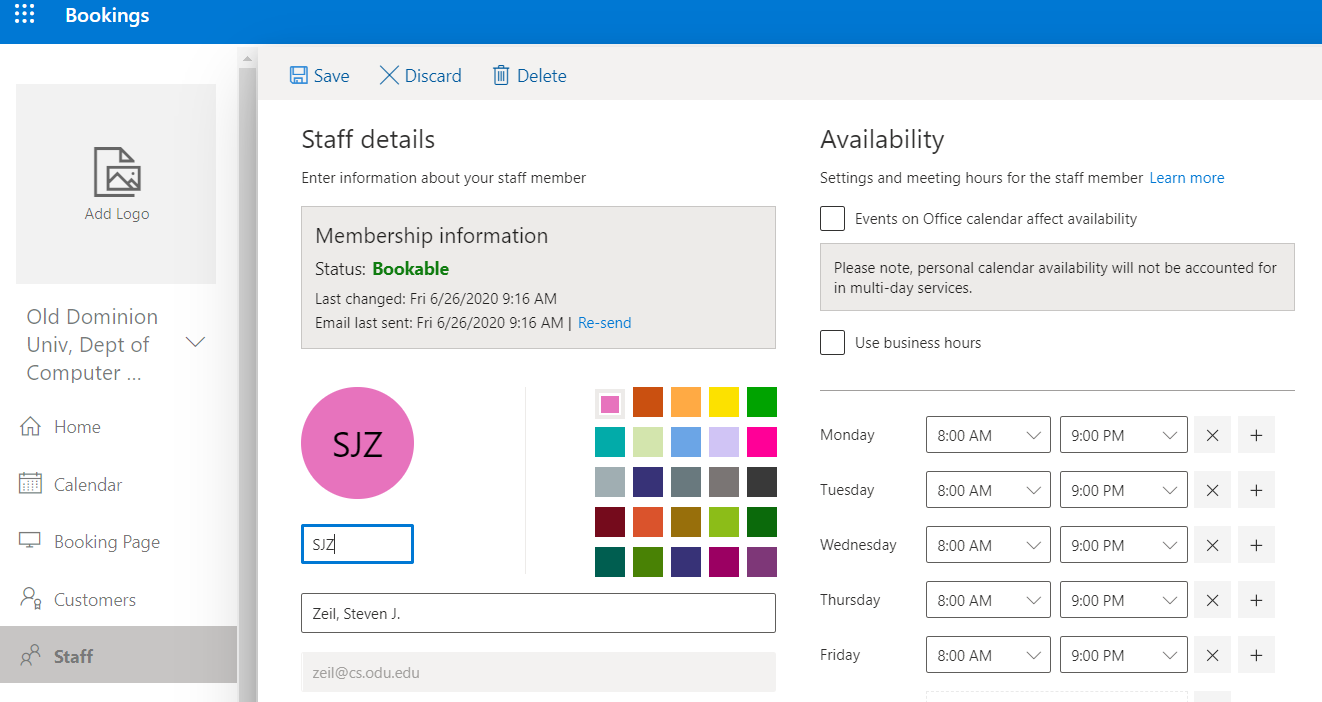
Update your contact info in the left column as necessary.
In the right-column.
- Select “Events on Office Calendar affect availability” if you use your MS Outlook Calendar on a regular basis.
- Clear “Use Business Hours”.
- In the listing of days below, set the earliest and latest times at which you ever hold office hours.
-
You aren’t committing to be available all day long - the detailed times will be set later.
-
Click
Save(top left) when done. -
Click
Booking Page.- Consider clicking “Require a … account…” to cut down on arbitrary appointments from people you’ve never heard of.
- For
Scheduling Policy, select the time per office hour appointment (I use 15 minutes). Set a lead time if you don’t want people setting appointments at the last minute. Set a Maximum lead time if you want to discourage people from trying to book your office hours for the entire semester. - Select “Notify business…”
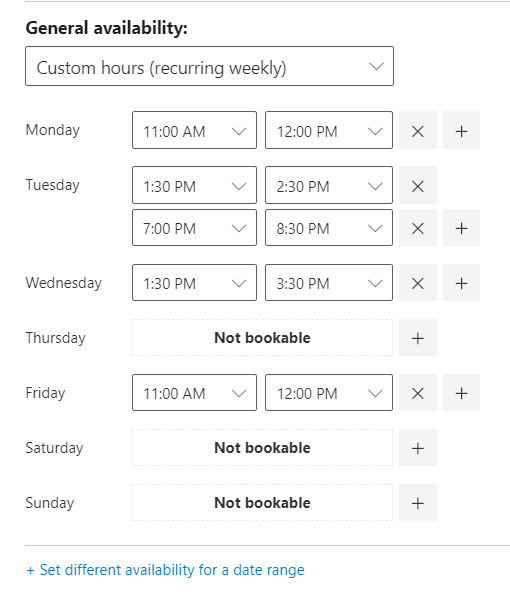
- Under
Availability, select “Custom hours” and enter the actual times and days for your office hours. There are the time slots from which students will be able to select.
-
Click
Services.You’ll see a dummy item there for Initial Consultation. We’ll get rid of that momentarily.
First, though, we need to create a new “Office Hours” service.
Click
+ Add a service.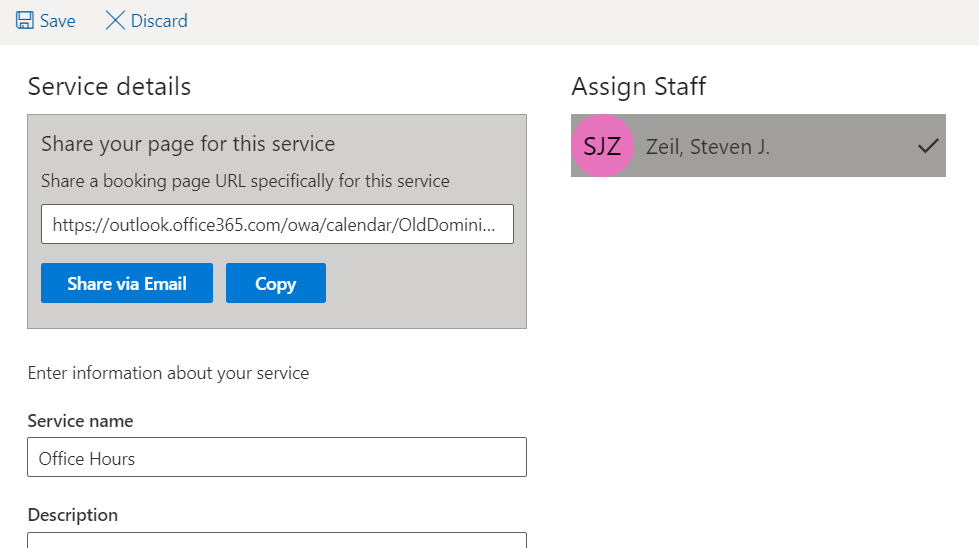
Fill in your basic service info:
- In the right-hand column, click your name to put a check mark there.
- Type “Office Hours” for the
Service Name - In
Default location, put the URL for your Zoom meeting. - Probably turn on “Enable customers to manage…”
- Select "Free:’ for
Default price - You might want to try “Enable text message notifications for your customer”
- “Show this service” should be checked.
- “Use the default scheduling policy” should be checked.
Click
Save. -
Select
Booking Page. The URL listed under “Share your page” is the one you will publish to your students. Copy it and paste into your syllabus, Blackboard course, home page, or wherever you want to publish your available times.
4 Try It Out
Open your web browser to the URL you saved for your shared page.
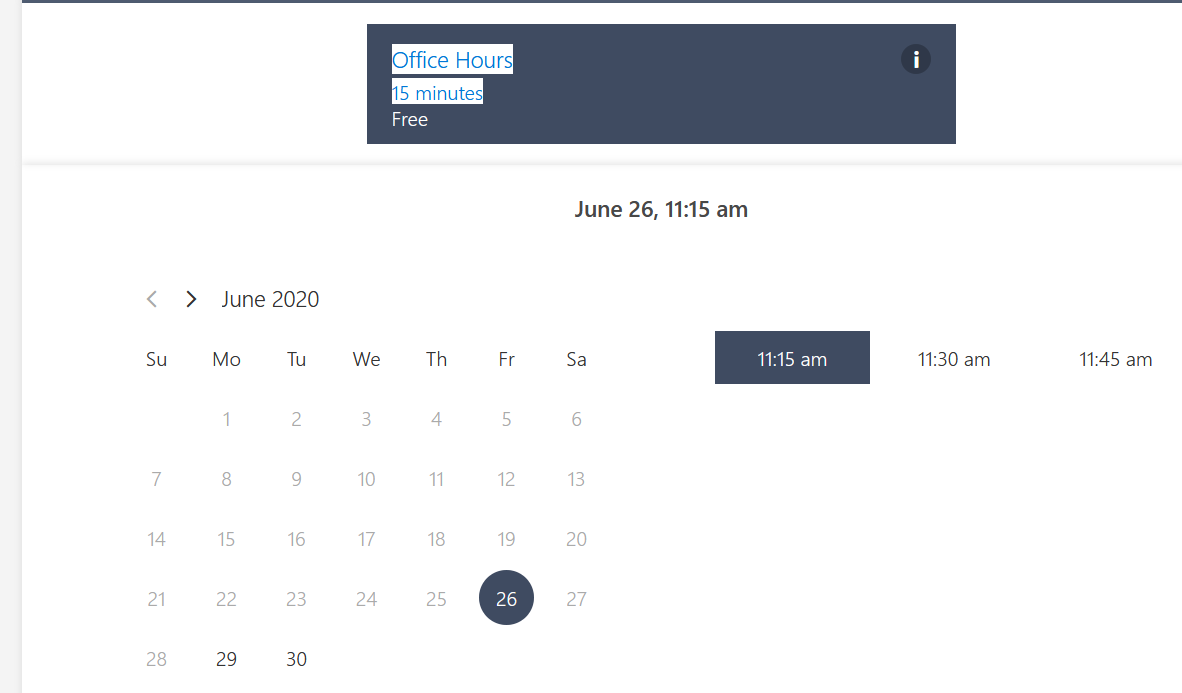
You should see something that looks like this:
Try making an appointment with yourself so that you can see wht your students will see.