
HowTo: Conduct Distance Office Hours with Zoom
Steven J. Zeil
This is a walk-through for setting up a Zoom conference to use for conducting office hours. This is an alternative to HowTo: Schedule Distance Office Hours using Google Calendar and Zoom (for ODU faculty).
With the approach described here, you post your office hours time and a conference link, students drop in without an an appointment and are placed in a waiting room, from which you can admit them one at a time or in groups.
I will assume that you already know how to use basic features of Zoom or have read my guide to lecturing with Zoom.
When you are using Zoom for a lecture, you want to let students join automatically. You don’t want to be bothered having to individually admit every latecomer. Bu contrast, during office hours you probably want to meet students behind the equivalent of a closed door, admitting each student individually. That’s what this walk-though is about.
1 1. Set Up Your Office Hours
-
Browse to odu.zoom.us. Click on
Sign Inand log in with your ODU MIDAS credentials. -
Click on
Schedule a Meetingin the upper right. -
Fill in the Topic and set the schedule.

You can use the
Recurring meetingbox to schedule repeated office hours at the same time each week.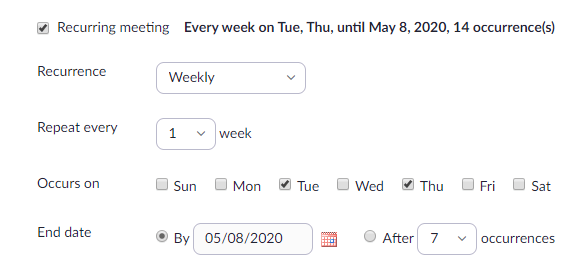
-
You probably want to allow both parties to use video:

-
Here’s the part that works for office hours, but that you would not want to do for lectures.
Put a checkmark by
Enable waiting room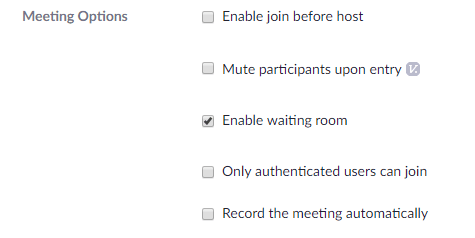
-
Click
Save.You’ll be presented with a summary of your meeting.

Take particular note of the
Join URL. That’s what you will publish to your students as the way to attend your office hours.You can use the same Join URL for all of your office hours, not just the ones at the times you have set for the meeting.
If you hold office hours at one time on Tues./Thurs., another time on Weds., and still another time on Fri., you don’t need to set up four different Zoom meetings and distribute four different URLs to your students.
2 Conduct Your Office Hours
-
When it’s time for your office hours, go to Zoom and
Sign inwith your MIDAS credentials. -
Click on
Meetingsand find an occurrence of your “Office Hours” meeting.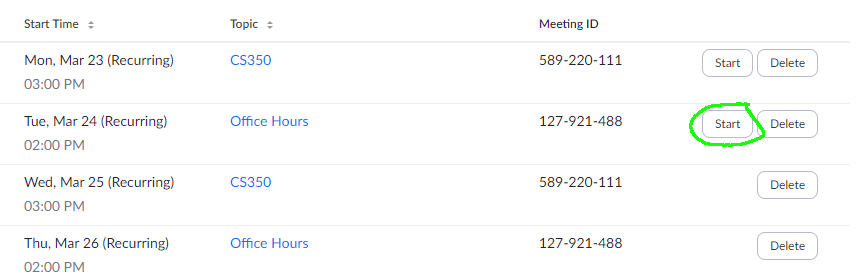
Click
Start. -
Zoom will start your meeting. Hopefully, this looks familiar to you.
-
When a student joins the meeting, they will be put into a waiting room and you will see a notice like this:
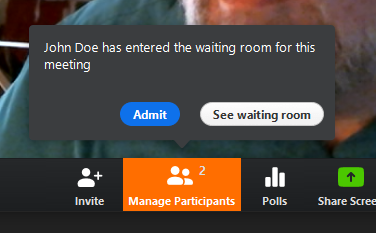
Click on
See waiting room. -
You’ll see a list of students in the waiting room. Hover your mouse over one of them to get the button you need to admit one of them to meet with you.
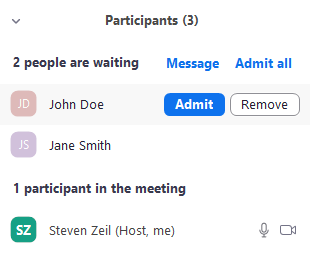
-
Click
Admitto bring that student into the room.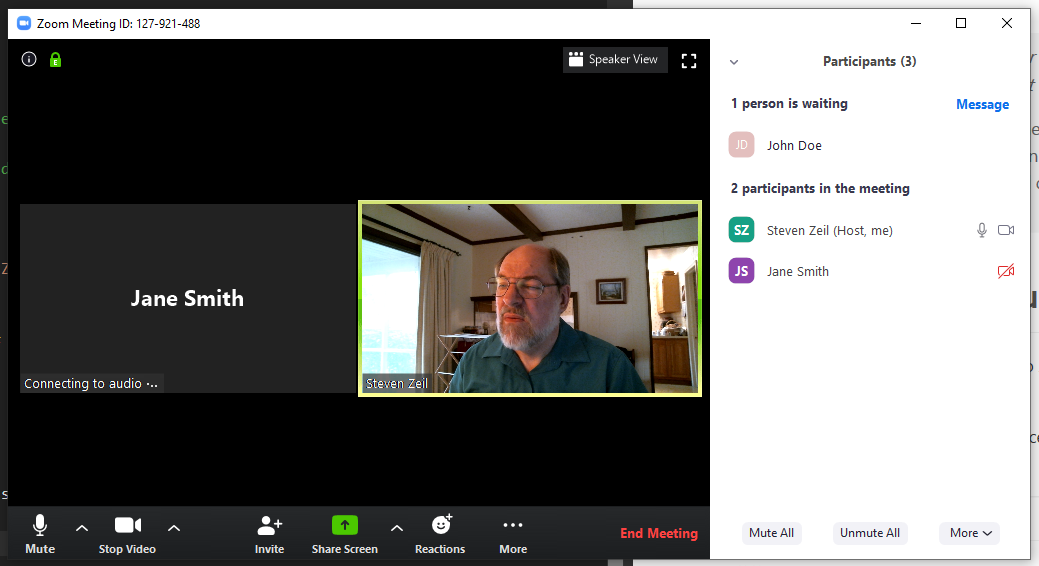
You can send students back to the waiting room if you want, admit someone else and talk to them, then go back and re-admit the first one.
-
During your meeting, students can share their screens to show you the work in progress that they want to ask questions about. You may need to tell the students how to find the Share Screen button.
Of course, you can share your own screen to show them things as well.